This project involves using board foam, layered together and sealed and painted, to create a very unique prop, although the techniques translate to other projects easily.
I once designed the show Revenge of the Space Pandas, which is a children’s theater piece by Mamet. Yep, you read that right! Mamet wrote some children’s theater, and while it’s not what I’d consider his niche, it was a fun play to design and included the need for a very large pumpkin that is used as an execution device by being dropped on heads of people. This article doesn’t address controlling the drop… I’m not a rigger and won’t pretend to be. It will address how we made the pumpkin itself and then made it look right.
Step 1- Rough cut foam layers
For this rough cutting I used a jigsaw. Doing so does release fumes by heating up the foam, so if you do it that way make sure you take proper safety precautions. The pumpkin wanted to be about 2 feet at its widest and about the same height, so I started by cutting two circles out of 2” thick blue board insulation foam that were 2 feet in diameter. Then I drew a circle centered in each of them that was 1’6” wide, leaving a 3” wide ring. I cut that out by stabbing the jigsaw blade in carefully to get started so that both sides were “good sides.”
Then I drew two circles that were 1’-9” in diameter and cut those out, centered 1’-3” circles in those leaving a 3” rim and cut those out
Lastly I cut the center out of one of the 1’-6” pieces at 1’-0, but left the other one whole.
Step 2- Glue together layers
For more info on this gluing process, see my article Great Stuff Technique for Gluing Foam.
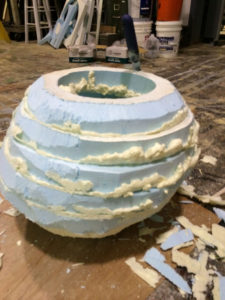
The layers will eventually be stacked in the following order:
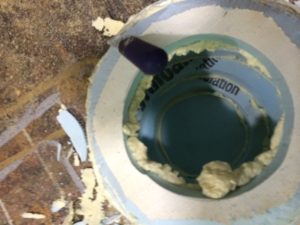
I had to cut away some of the spray foam on the inside to make room for the cap to plug in.
1’-6”
1’-9”
2’-0”
2’-0”
1’-9”
1’6”
There are parts of this that have started getting carved to look round and party that haven’t been touched yet. Start by getting the overall shape where you want it.
I ended up using 7 layers total and the 7th layer was the removable “cap” which I made out of one of the 1’-3” pieces, but that didn’t get glued on to this… it did, however, end up with the 1’-0” circle glued to the center to keep the cap in place once it was built.
I did half of the gluing on one day and then let them cure overnight and did the other half on day two. On day one I glued the two middle 2’ pieces to each other and then the two pieces that made up the ends. I also glued the cap to it’s stopper. On day two I attached the bottom (which was the piece without a hole) to the middle first thing, and then came back later when it seemed not so wiggle and attached the top.
Step 3- Carve foam

This picture shows how I used a pull saw in the process of rounding off the overall shape.
For this project I used a hand pull saw , surform rasp
 , a surform shaver
 and a mini rasp set
 for a majority of the carving once the foam was hooked
together. It’s possible that I also used a steak knife at some point for small stuff. I started by rounding off the overall shape into a round shape and getting rid of all the corners left by the foam. Then I drew the face and carved that in, making sure I carved it all the way through in places where I wanted the pumpkin to glow like a jack-o-lantern. I drilled the hole in the center of the eyeball all the way through and then cut out the space between the teeth as if I were carving a jack-o-lantern all the way through, then I carved the shapes to be the right texture and shape.
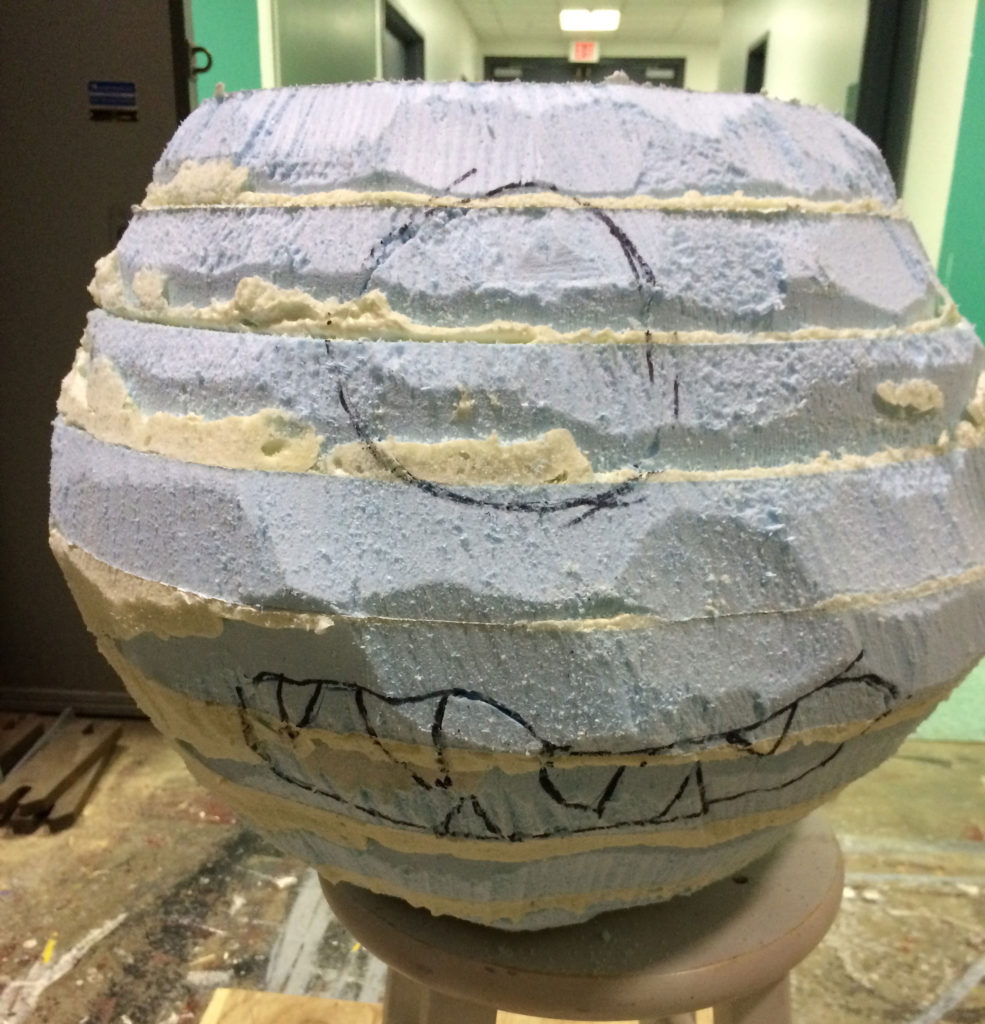
Face sketched in and more detailed carving is ready to begin.
Step 4- Rig to hang
I’m not going to completely detail how we rigged this to hang. If you are rigging things, you should make sure you know what you are doing with some more extensive education than this blog can provide. This is the time where you should rig it though, so you can mask your rigging appropriately with the “making it pretty” steps in the process.
Step 5- Seal foam
In this case, we knew the pumpkin was going to experience some rough treatment and we wanted it to hold up for the whole production. We had some lightweight muslin and jaxsan already on hand from a prior show, and decided they’d do quite well. We ripped the muslin into strips and frayed the edges, so the edges would be less noticible. We also tried to arranged edges so they fell in the “cracks” of the pumpkin whenever possible, working with the long direction of the strips in the top-to-bottom of pumpkin orientation. We slopped some jaxsan on the pumpkin in similar sized strips as the muslin, laid a strip of muslin on top of the wet jaxsan and then brushed jaxan over the muslin all while it was still wet, in a similar manner to papier-machier. Overall, most of the pumpkin ended up with almost 2 layers. We finished the whole pumpkin in one sitting and let it dry on some stilts of 2” screws driven all the way through ¾” lumber and placed upside down…. The screws gave the pumpkin a few tiny points to dry on.
Step 6- Paint 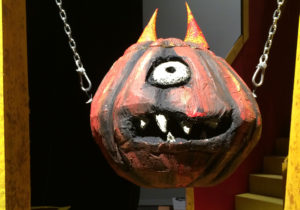
The whole show had a mildly cartoony feel, so we painted the pumpkin with black in the deepest areas to fit with the theme. We used the same reds and yellows that appeared on the rest of the set to create an orange for the pumpkin and then also used those same reds and yellows as accent colors on the pumpkin’s horns.
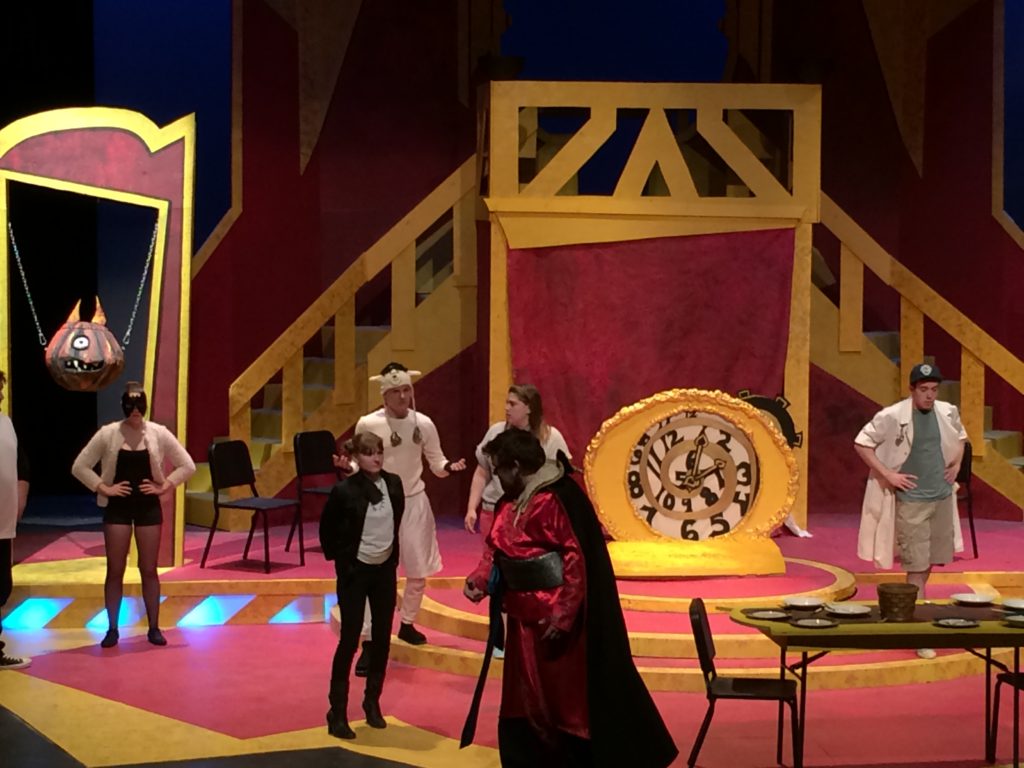
Pumpkin in context sometime during tech week. The clock in the center uses spray foam as a detail around the edges.